摘要
version:6.5.4
# 一:快照
ElasticSearch提供了snapshot功能,首先需要编辑 config/elasticsearch.yml 文件增加备份库存的位置。比如 path.repo: /home/backup/es
创建repo
[root@ccj ~]# curl -XPUT 'http://localhost:9200/_snapshot/my_repository' -d '
{
    "type": "fs",
    "settings": {
        "location": "/home/backup/es/my_repository",
        "compress": true
    }
}'
1
2
3
4
5
6
7
8
2
3
4
5
6
7
8

创建snapshot
对索引ccj_test创建快照
[root@localhost elasticsearch-6.5.4]# curl -XPUT 'http://localhost:9200/_snapshot/my_repository/snap_1?wait_for_completion=true' -H 'Content-Type: application/json' -d '
{
    "indices": "ccj_test",
    "ignore_unavailable": "true",
    "include_global_state": false
}'
1
2
3
4
5
6
2
3
4
5
6


wait_for_completion 参数表示会等到snapshot完成才返回,不加这个参数也可以通过其他接口获取到快照的进度
[root@localhost elasticsearch-6.5.4]# curl -XGET "http://localhost:9200/_snapshot/my_repository/snap_1/_status?pretty"
1
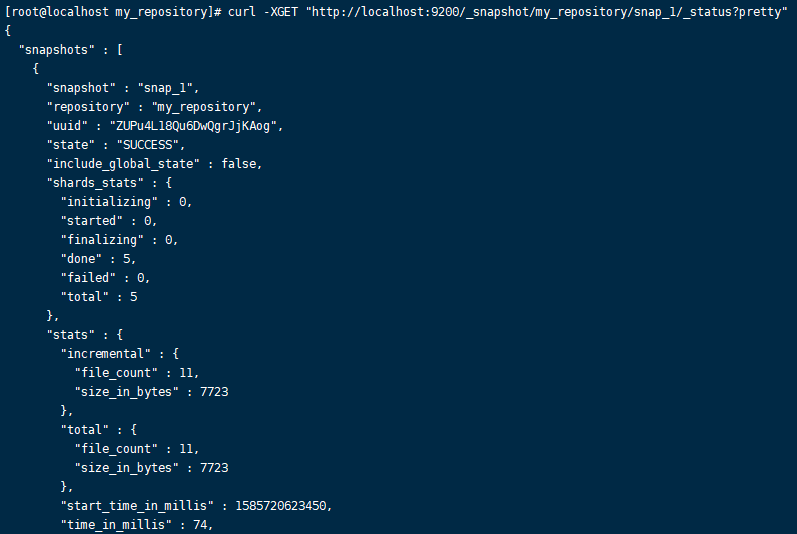
查看snapshot
[root@ccj ~]# curl -XGET 'http://localhost:9200/_snapshot/my_repository/snap_1?pretty'
1
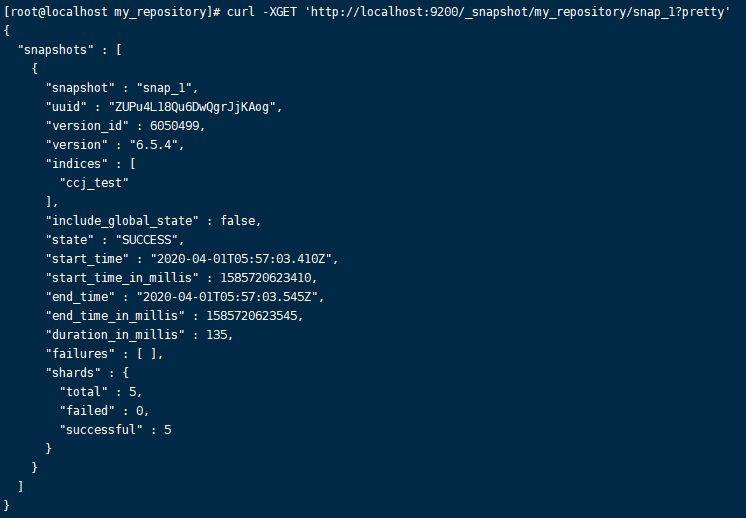
查看所有snapshot
[root@ccj ~]# curl -XGET 'http://localhost:9200/_snapshot/my_repository/snap_1?pretty'
1
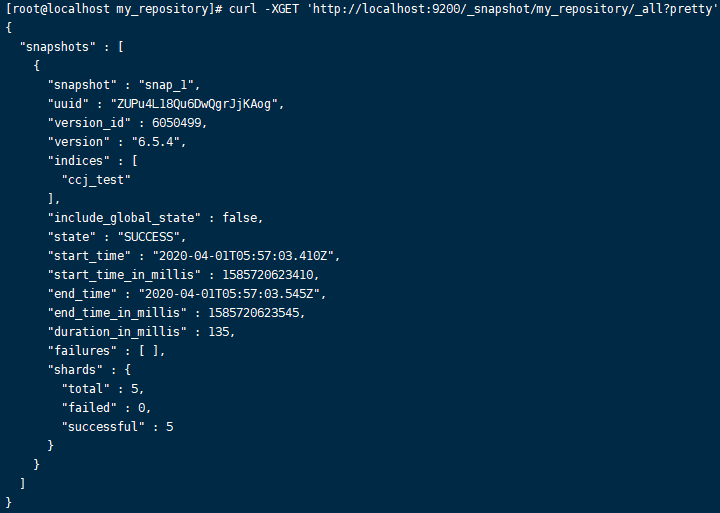
删除某个快照
[root@ccj ~]# curl -XGET 'http://localhost:9200/_snapshot/my_repository/snap_1?pretty'
1
删除所有快照
删除操作还可以终止一个正在进行的快照备份
[root@ccj ~]# curl -XGET 'http://localhost:9200/_snapshot/my_repository?pretty'
1
恢复snapshot
[root@ccj ~]# curl -XPOST 'http://localhost:9200/_snapshot/my_repository/snap_1/_restore?wait_for_completion=true&pretty' -H 'Content-Type: application/json' -d '
{
    "indices": "ccj_test",
    "ignore_unavailable": "true",
    "include_global_state": false,
    "rename_pattern": "ccj_test",
    "rename_replacement": "restore_ccj_test"
}'
1
2
3
4
5
6
7
8
2
3
4
5
6
7
8
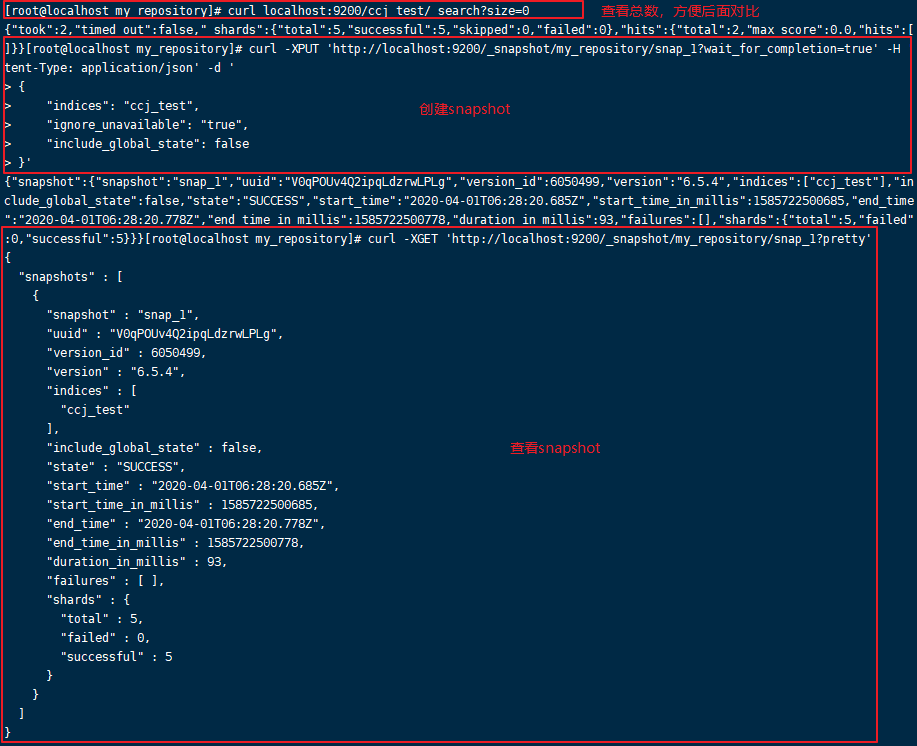
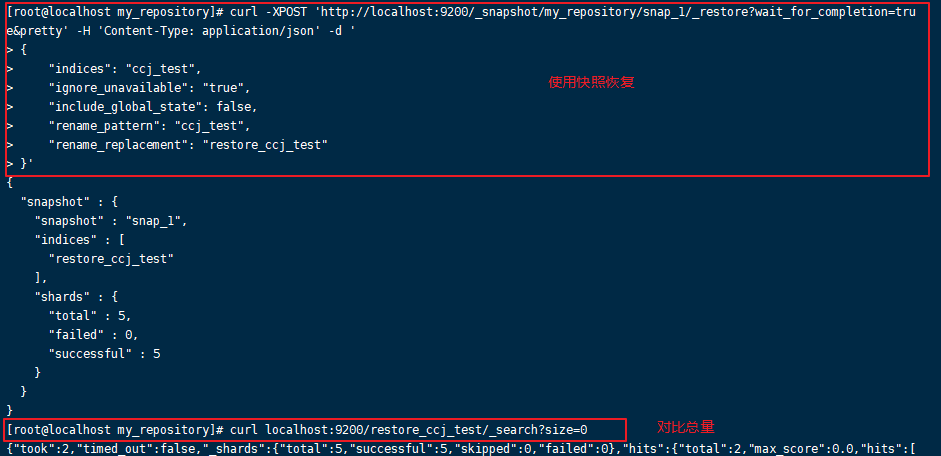
参数 rename_pattern 和 rename_replacement 用来正则匹配要恢复的索引,并且重命名。下面的例子:test-index => copy_index, test_2 => coyp_2
[root@ccj ~]# curl -XPOST "http://localhost:9200/_snapshot/my_repository/snap_1/_restore?wait_for_completion=true&pretty" -H 'Content-Type: application/json' -d '
{
    "indices": "test-index,test-2",
    "ignore_unavailable": "true",
    "include_global_state": false,
    "rename_pattern": "test-(.+)",
    "rename_replacement": "copy_$1"
}'
1
2
3
4
5
6
7
8
2
3
4
5
6
7
8
# 二:报错解决
错误1 
解决方法
elasticsearch账号没有改目录权限,分配相关权限
[root@ccj ~]# sudo chown -R elasticsearch:elasticsearch /home/backup/
1
